Why custom app chains beat monolithic chains
General-purpose L1s and L2s force every application to compete for the same block space and computational resources. This shared environment creates bottlenecks during high traffic, causing transaction fees to spike and confirmation times to lag. A custom app chain removes this contention by dedicating a blockchain exclusively to one specific application, allowing developers to tune the architecture for their exact needs.
The primary advantage is isolation. When an app chain operates independently, a security exploit or performance issue in a neighboring application never impacts its stability. This separation is critical for enterprise-grade deployments where uptime and predictable latency are non-negotiable. Frameworks like Cosmos SDK and Avalanche Subnets make this isolation straightforward to implement, letting you define your own consensus rules, tokenomics, and upgrade schedules without waiting for a broader network to approve changes.
Performance scales linearly with usage rather than being capped by network-wide limits. Because the chain only processes transactions relevant to your application, you can increase throughput by adding more validator nodes specific to your workload. This modular approach aligns with the 2026 shift toward specialized infrastructure, where flexibility and speed matter more than generic compatibility.
The trade-off is operational complexity. You are responsible for securing your own validator set and managing your own governance. However, the control you gain over the stack usually outweighs the overhead, especially for applications with unique data or privacy requirements that generic chains cannot efficiently support.
Choose the right modular framework
Selecting a framework determines how you write smart contracts, manage consensus, and interact with other chains. In 2026, the landscape is dominated by three modular options, each serving a distinct architectural need. Your choice depends on whether you prioritize developer familiarity, cross-chain interoperability, or isolated performance.
Cosmos SDK: The Interoperability Standard
The Cosmos SDK is the default choice for most new appchains launching in 2026. It offers a modular Go-based toolkit that simplifies building application-specific blockchains. Its primary advantage is the Inter-Blockchain Communication (IBC) protocol, which allows your chain to natively exchange assets and data with the broader Cosmos ecosystem.
Choose this if you need a mature ecosystem, extensive documentation, and a large pool of developers who already know the stack. It is ideal for DeFi protocols, NFT marketplaces, and governance-heavy applications that benefit from connecting to existing liquidity pools.
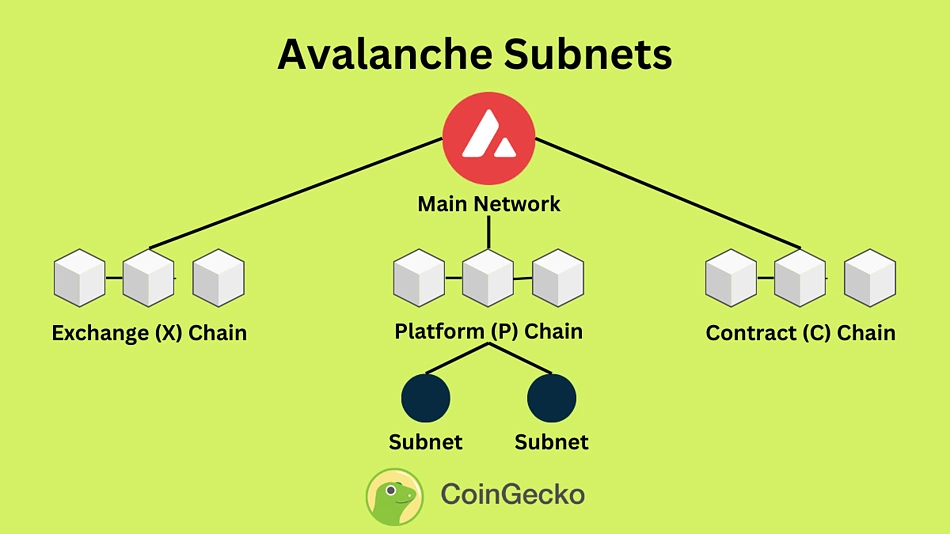
Avalanche Subnets: Performance and Customization
Avalanche Subnets provide a flexible architecture for apps that require their own chain rules without the overhead of building a new consensus engine from scratch. Subnets allow you to define custom virtual machines, gas models, and state transition rules while inheriting Avalanche’s high-throughput consensus.
This framework suits applications needing high throughput, low latency, and the ability to customize finality times. It is particularly strong for gaming, enterprise supply chains, and tokenized real-world assets where performance constraints are critical.
Polkadot Substrate: The Flexible Foundation
Polkadot’s Substrate framework is a Rust-based toolkit that offers maximum flexibility for building bespoke chains. Unlike Cosmos, which is opinionated about IBC, Substrate lets you design your chain’s consensus, runtime, and networking layers independently. It integrates natively with Polkadot’s relay chain for security and parachain slot auctions.
Use Substrate if you need deep control over your chain’s internals or plan to build a parachain on Polkadot. It has a steeper learning curve due to Rust and its unique runtime upgrade mechanism, but it offers unparalleled customization for complex decentralized applications.
Code Comparison: Initialization
The following snippets illustrate the basic node initialization for Cosmos SDK and Substrate. Note the difference in language and configuration approaches.
Decision Checklist
Use this checklist to finalize your choice:
-
Developer Availability: Is your team experienced in Go (Cosmos) or Rust (Substrate)?
-
Ecosystem Needs: Do you need immediate access to IBC liquidity or Polkadot parachain slots?
-
Performance Requirements: Do you need customizable finality and high throughput (Avalanche)?
-
Maintenance Burden: Are you prepared to maintain core consensus code (Substrate) or use a battle-tested SDK (Cosmos)?
Choosing the right framework early prevents costly migrations later. Align your technical stack with your application’s long-term goals, not just current trends.
Configure consensus and security
Your app chain’s consensus mechanism determines how blocks are finalized and who gets paid. In 2026, you generally choose between Proof of Stake (PoS) for broad decentralization or Practical Byzantine Fault Tolerance (PBFT) for high-speed finality. This decision also dictates your security model: do you run your own validator set, or lease security from a larger network?

Start by selecting the consensus algorithm that matches your throughput needs. Cosmos SDK supports Tendermint BFT, which is a PBFT variant optimized for fast finality. If your app chain requires thousands of transactions per second with minimal latency, BFT is the standard choice. For slower, more decentralized networks, Ethereum’s PoS or other PoS variants may be more appropriate. This choice is baked into your chain’s configuration file and cannot be changed after launch without a hard fork.

You have two primary paths for securing your chain. The first is self-sovereign security, where you recruit and pay your own validators. This gives you full control but requires significant capital and operational overhead. The second is shared security, where your chain inherits security from a larger parent network. For example, StarkWare’s appchains inherit security from the layer they settle on, reducing the need for a dedicated validator set. Shared security lowers barriers to entry but introduces dependency risks.
Regardless of the security model, you must define the minimum stake required to become a validator. This threshold prevents sybil attacks and ensures validators have skin in the game. If you are using a framework like Avalanche, you can configure subnets with specific validator sets. For shared security models, you may rely on the parent chain’s validator set, meaning you do not need to manage individual node operators. Document these requirements clearly, as they will affect your governance and economic tokenomics.
Slashing is the penalty for malicious or negligent behavior by validators. Define clear rules for what constitutes a violation, such as double-signing or extended downtime. In a PoS system, slashing rewards honest validators by reducing the supply of the malicious validator’s stake. Ensure your configuration file includes these penalties, as they are the primary deterrent against attacks. Without robust slashing conditions, your consensus mechanism is vulnerable to collusion or laziness.
Before connecting to any mainnet or shared security provider, run your app chain in a local testnet. Use tools like gaiad for Cosmos-based chains to spin up a multi-node environment. Verify that consensus finality works as expected and that slashing conditions trigger correctly. This step is critical for identifying configuration errors before they become costly on-chain incidents. A well-tested consensus layer prevents forks and ensures data integrity from day one.
Deploy the chain and testnet
Deployment turns your configuration into a live network. You are moving from local simulation to a persistent state that external nodes can join. This phase requires precise execution of the genesis block and careful management of RPC endpoints to ensure your testnet remains stable during integration testing.
Generate and distribute the genesis block
The genesis block defines the initial state of your app chain. It contains the validator set, token distribution, and consensus parameters. Use your framework’s CLI tool (e.g., init in Cosmos SDK or subnet create in Avalanche) to generate this file. Validate the JSON structure before proceeding; a malformed genesis file will cause immediate node failure.
Once generated, distribute this file to all validator nodes. Ensure every node runs the exact same genesis hash. Any discrepancy in the chain_id or initial validator addresses will prevent the network from starting. Commit the genesis file to your version control system to maintain reproducibility.
Start validator and full nodes
Launch your first validator node using the genesis block. Set the p2p.laddr to bind the node to your network interface. Configure the rpc.laddr to expose the JSON-RPC interface, typically on port 26657 for Cosmos-based chains. Monitor the logs for the Genesis hash match confirmation.
After the validator is running, start additional full nodes. These nodes sync with the validator to replicate the chain state. Use the --genesis-hash flag to ensure they connect to the correct network. Do not add external peers yet; keep the network isolated to your testset to prevent unintended connections or spam.
Configure RPC endpoints and APIs
Your application needs to read from and write to the chain via RPC endpoints. Expose the Tendermint/RPC port and the GRPC port on your validator node. For production-like testing, consider setting up a load balancer or using a managed RPC provider like Chainstack to handle query loads.
Test connectivity using curl or a simple script. Query the latest block height using the /status endpoint. If you receive a response, your node is live. If the request times out, check your firewall rules and ensure the RPC port is not blocked by cloud provider security groups.
Run integration tests
Before inviting external users, run integration tests to verify contract functionality and consensus. Deploy a test smart contract to your local testnet. Execute a few transactions and verify they are included in blocks.
Check for latency and finality times. In a modular blockchain setup, ensure your application-specific chain is correctly sequencing transactions from your rollup or sidechain. If using a framework like Cosmos, verify that IBC (Inter-Blockchain Communication) channels are open if your testnet involves multiple chains. Fix any consensus errors or state mismatches before moving to a public testnet.

Run your framework’s initialization command to create the genesis.json file. Validate the JSON structure and commit it to version control. This file defines the initial validator set and token supply.
Launch the first node with the genesis file. Bind the P2P and RPC ports. Monitor logs to confirm the node starts and begins proposing blocks. Ensure the chain ID matches your configuration.
Start additional full nodes and connect them to the validator. Verify they sync to the latest block height. These nodes will handle read queries and replicate state without producing blocks.
Configure firewall rules to allow external access to the RPC port. Test connectivity using a simple /status query. Set up load balancing if you expect high query volume during testing.
Deploy test smart contracts and execute transactions. Verify block inclusion times and consensus stability. Check IBC channels if your architecture involves multiple chains.
Connect your dApp to the app chain
With the chain live, the next step is routing your frontend and asset flows to the new infrastructure. This phase turns a standalone node into a usable environment for your users. You will configure the RPC endpoints for your interface and set up the bridge contracts that move tokens between the base layer (Ethereum, Cosmos Hub, Avalanche C-Chain) and your app chain.
Configure RPC endpoints
Your frontend needs to know where to read and write data. In the 2026 modular landscape, you typically connect via a dedicated RPC endpoint provided by your node operator or a public indexer like Alchemy or QuickNode.
Update your web3 library (such as ethers.js or viem) to point to this new URL. Ensure you are using the correct chain ID and currency symbol to prevent network mismatch errors. If your app chain uses a custom EVM bytecode or IBC-enabled Cosmos SDK modules, verify that your provider supports these specific features.
Bridge assets to the app chain
Assets do not move automatically. You must deploy or use existing bridge contracts to lock tokens on the source chain and mint wrapped equivalents on the app chain. For EVM-based app chains, this often involves a standard ERC-20 lock-and-mint mechanism. For Cosmos-based chains, you will use the Inter-Blockchain Communication (IBC) protocol to transfer native tokens.
Test this flow with small amounts first. Verify that the bridge contract correctly reflects the locked balance on the source chain and the minted balance on the app chain. Monitor the block finality times; if your app chain is faster than the source chain, ensure your frontend handles pending states gracefully.
Verify frontend connectivity
Before opening to users, run a full integration test. Check that wallet connections (MetaMask, Keplr, etc.) correctly detect the new network. Ensure transactions broadcast successfully and that the UI updates in real-time based on the new chain’s state. If you are using a cross-chain indexer, confirm that it is syncing the app chain’s events accurately.
-
Update web3 provider RPC URL and chain ID
-
Verify bridge contract deployment on both source and app chains
-
Test small-value asset transfer from source to app chain
-
Confirm wallet network switching works in the frontend
-
Run integration test for transaction broadcasting and state updates
App Chain vs. Monolithic Blockchain FAQ
This section addresses the technical distinctions between app chains and monolithic blockchains, focusing on deployment, costs, and maintenance in the 2026 modular landscape.
No comments yet. Be the first to share your thoughts!